Let's take a look at the functions implemented so far.
The software considers two kind of users: Superusers and standard one .
The Superusers are granted by writing their phone numbers into the SIM phone book at the first positions. They can also perform the administration commands: check status, manage the phone book etcetera.
The standard users have to be granted by writing their phone number into the phone book, stored permanently in the Arduino EEPROM. They can perform just the standard commands, listed below.
User commands
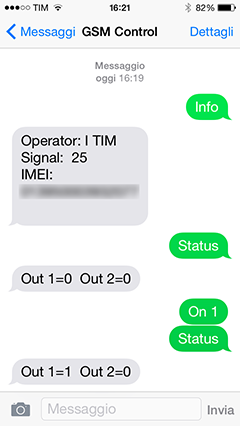
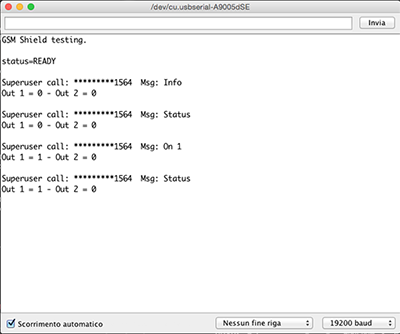
"ON 1" : OUT 1 = ON (PIN 12)
"OFF 1" : OUT 1 = OFF
"ON 2" : OUT 2 = ON (PIN 13)
"OFF 2" : OUT 2 = OFF
"STATUS" : Request current status of the outputs without any change
Superuser commands (manage phone book)
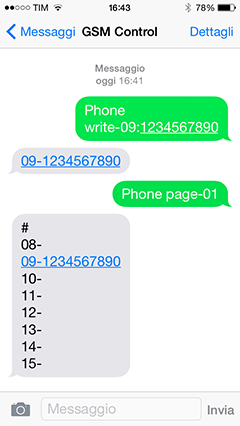
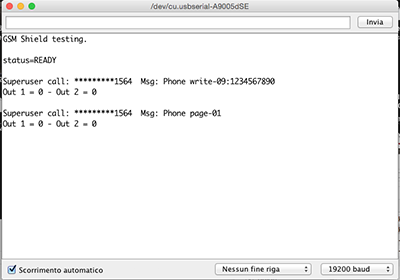
"PHONE WRITE-xx:nnnnnnnnnn" Write number to grant nnnnnnnnnn into the phone book address xx. Sends back the value read on EEPROM after writing, for verification
"PHONE PAGE-x" Request reading page x (0 to 7) from phone book, 8 numbers per page
"PHONE READ-yy" Request reading granted phone number from address yy (0 to 63) of phone book
"PHONE FORMAT-1234" Phone book format. Fills up all the EEPROM bytes with 0. Sends back a message for confirmation
Superuser commands (other)
"INFO" Request some info from the SIM900 module (operator, signal strength, IMEI)
"ACK ON" Enable Acknowledge call back (phone back to confirm)
"ACK OFF" Disable Acknowledge call back (default)
"PRI ON" Enable privacy (default) (don't show the whole calling number on debug window)
"PRI OFF" Disable privacy
GSM remote control
The SIM9000 module has plenty of features for GSM, GPRS and phone call use. All of them are controlled with a rich AT style command sets.
The Arduino sketch uses the Marco Martines library to simplify the programming wrapping the raw AT commands. This library has been slightly modified by me in order to add some useful feature. Both Arduino sketch and modified library can be downloaded here. Once downloaded unzip the file and put the MyGSMSHIELD folder into the Arduino IDE library folder. Load the sketch to your Arduino board and start.